Deploying a Gitea with Tailscale Sidecar on your Synology
Archived post · originally published · may be out of date
Article inspiration: https://davegallant.ca/blog/setting-up-gitea-actions-with-tailscale
Intro
I had the opportunity of recently redeploying my self-hosted Gitea server because it never functioned properly after it became the product of a botched database migration. This time around, my Gitea environment would use a proper database and it would become the testbed of integrating a Tailscale container within the application itself.
Why Tailscale (containers)?
If you are unaware of what Tailscale is, it is a way to effortlessly implement and manage your own personal software-defined mesh virtual private network (VPN) that is a replacement for a traditional VPN. Simply install the Tailscale application on your devices of choice, add it to your Tailnet, and then bam your devices can now communicate with each other regardless of what current network or firewall policies are applied to that device. I love Tailscale and it is easily one of the best services I have deployed to my own personal environment and client environments as well. One incredible feature that Tailscale has implemented are Tailscale containers.
How a Tailscale container works is that you can redirect another container's network traffic to that Tailscale container (almost as a reverse-proxy), and then access the redirected container immediately through your own Tailnet.
Explained more in-depth:
- You deploy a Tailscale container that contains the DNS name you want your application container to use on your Tailnet
- You now deploy your application container but route its network traffic through your Tailscale container which now makes it accessible immediately via your Tailnet
- The parameter that makes this happen (in your docker compose file) is specifying the
network_modeused by the application container -> for example,network_mode: service:[YOUR TAILSCALE CONTAINER] - I should note that even though your application container is redirecting its traffic through the Tailscale container, it can still connect to other containers in its container local network (for example an application container can still communicate to a database server if needed)
- The parameter that makes this happen (in your docker compose file) is specifying the
The benefits of the Tailscale container approach is simplicity and portability. In theory, one should be able to "lift and shift" a Tailscale container environment from one container host to another without the need to:
- configure the container host's network
- configure the network that the host is on
- configure a reverse proxy for the containers themselves Here is a quick overview from Tailscale themselves.
How To
My environment consists of my Synology running Portainer and utilizing my Tailnet. Secondly, my Gitea deployment uses a standalone database server (postgres).
Deploy Portainer
I highly recommend using Portainer to manage and deploy your containers on your Synology (instead of Container Manager) but you can skip this step if you are comfortable with the command line (we will be using a docker compose file). Here is a quick guide on how to install Portainer on your Synology.
Create new folders on your Synology
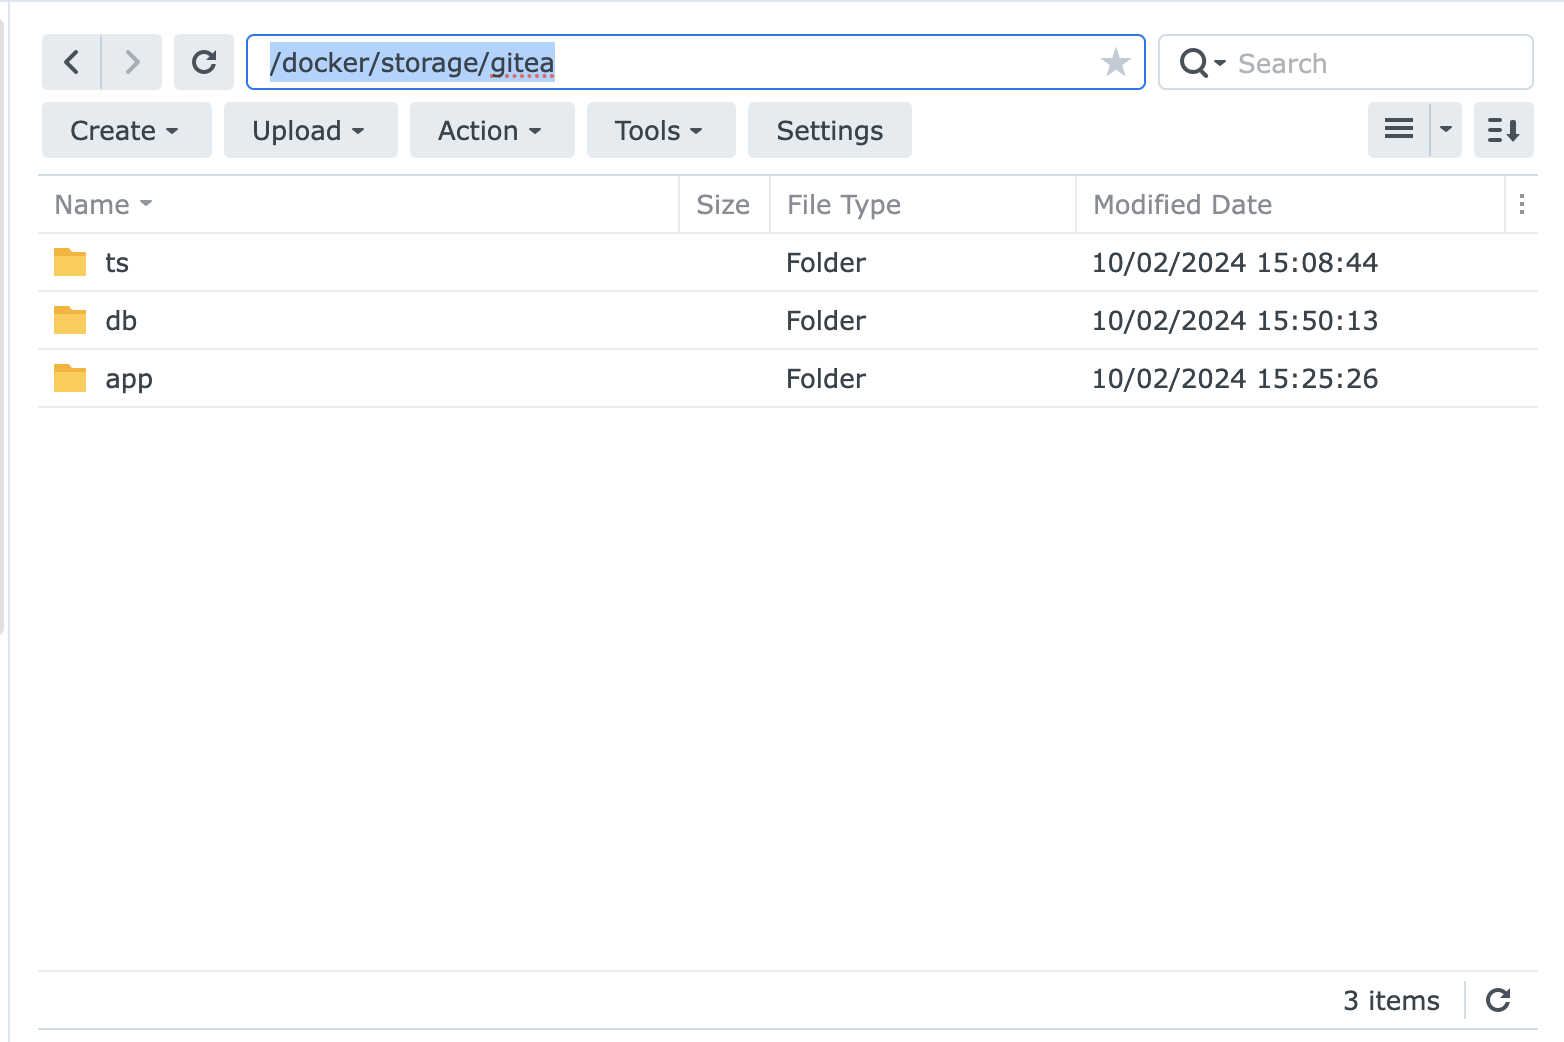
Create a new gitea folder located in your docker shared folder, then create three subfolders:
ts-> this folder will be used by the Tailscale container- Within this folder, create two additional subfolders as well:
stateconfig
- Within this folder, create two additional subfolders as well:
db-> this folder will be used by the Gitea databaseapp-> this folder will be used by the Gitea app itself
In my case, the path I used was /docker/storage/gitea which contains my three subfolders because I like having an additional sub-folder to store all of my container data instead of putting it in the root of docker:
Create a Tailscale auth key
If you do not have a Tailscale account (therefore a Tailnet) then please follow this guide from Tailscale to get you started.
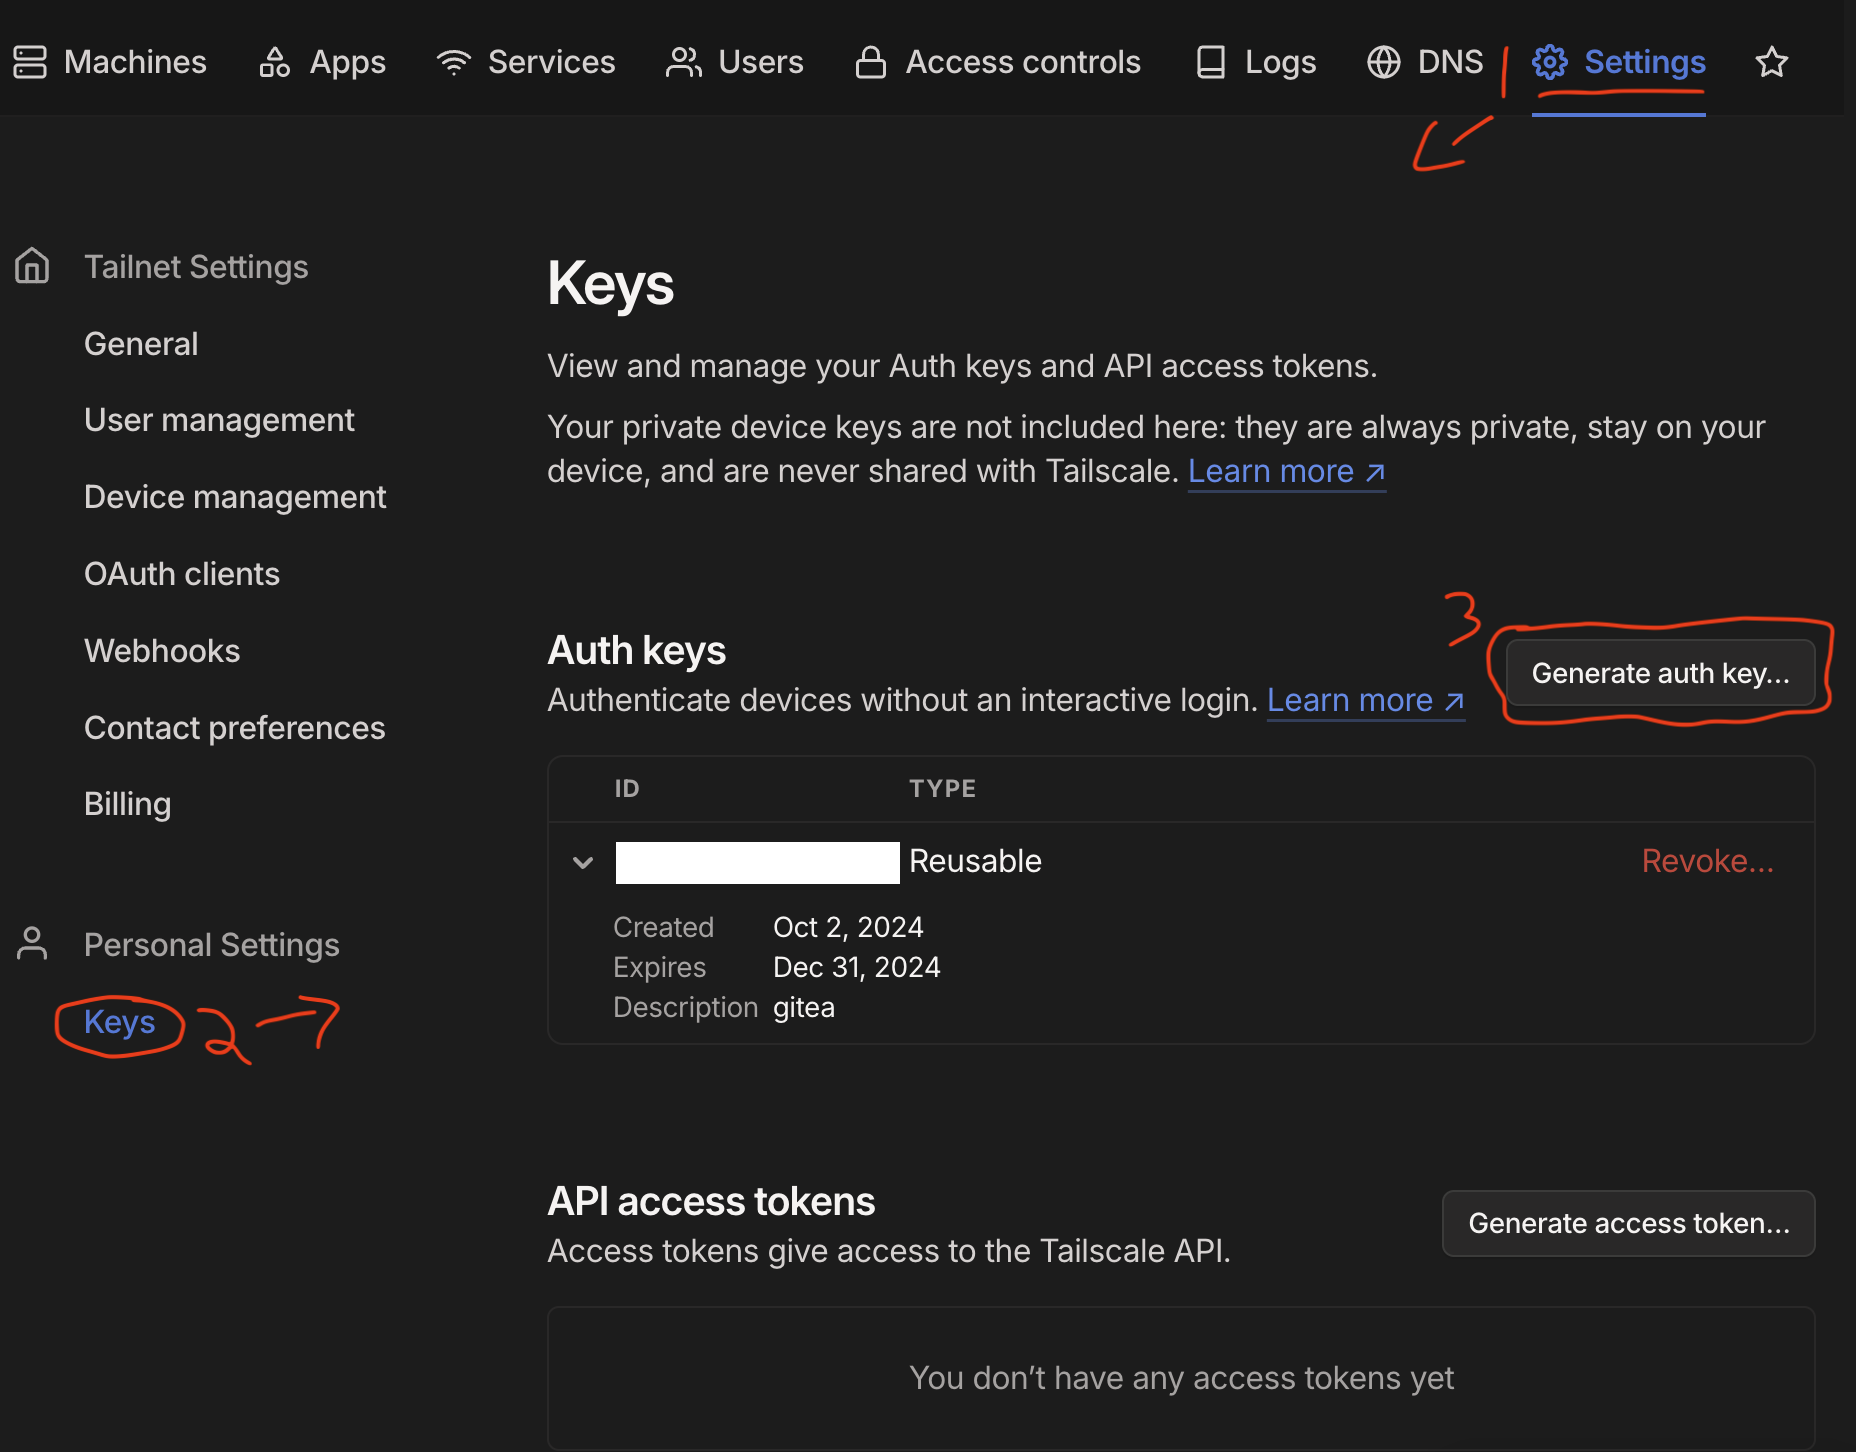
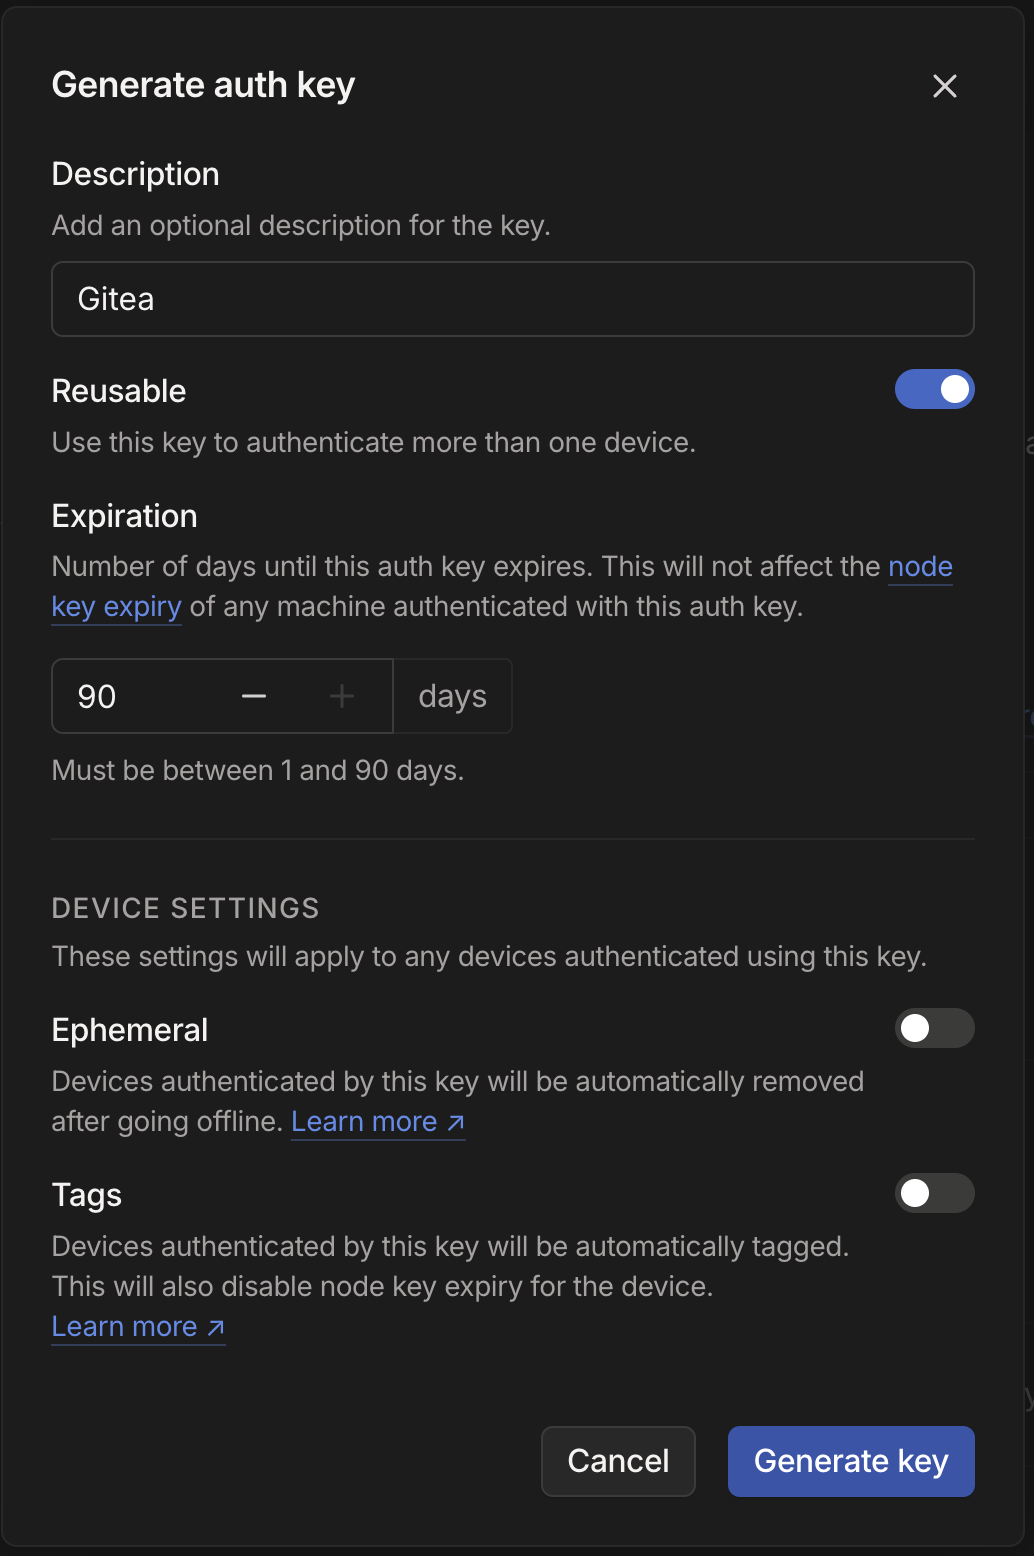
Sign into your Tailscale account, go to settings, and then keys on the bottom left. From there select Generate auth key and generate a key (save it for later) which we will use in our docker compose file -> I made my auth key reusable as I will use it for other containers.
Another crucial difference is token / key expiry. On the face of it, it appears that an auth key will be useless after the maximum 90 day expiry window. However, when an auth key expires it doesn't automatically mean any machine which used it to authenticate to your tailnet is suddenly expired as well—it simply means you can't use that key to add any new nodes, existing ones continue to function until their node keys expire (default is 180 days). Nodes added with an OAuth client never expire.
Deploy Gitea
Create a new file called config.json, copy the values from below, and save it in the previously created config folder located in the ts folder.
- What this config file does is take the HTTP site created by Gitea, on port 3000 (the default port used), and then redirect it to port 443/HTTPS
- The
AllowFunneloption is set tofalsefor this deployment but you can set it totrueif you want to publish your Tailscale container publicly - I am not using SSH with my Gitea server so I do not have it configured below in my configuration file (or my docker compose file)
{
  "TCP": { "443": { "HTTPS": true } },
  "Web":
    {
      "${TS_CERT_DOMAIN}:443":
        { "Handlers": { "/": { "Proxy": "http://127.0.0.1:3000" } } }
    },
  "AllowFunnel": { "${TS_CERT_DOMAIN}:443": false }
}
Deploy the following compose file as a stack to Portainer:
- If the deployment was successful then the login page for your Gitea container will be
gitea.[YOUR-TAIL-NET].ts.net - Make sure to update the various
volumespaths for each container with your own paths - Make sure to also update the following values with your own values:
- For the
ts-giteacontainer ->hostname,TS_AUTHKEY, andTS_HOSTNAME - For the
giteacontainer ->GITEA__server__DOMAIN,GITEA__server__ROOT_URL, andGITEA__server__LFS_JWT_SECRET
- For the
services:
  db:
    image: postgres:latest
    restart: always
    environment:
     - POSTGRES_USER=gitea
     - POSTGRES_PASSWORD=gitea
     - POSTGRES_DB=gitea
    volumes:
      - /volume1/docker/[YOUR GITEA FOLDER]/db:/var/lib/postgresql/data
  ts-gitea:
    image: tailscale/tailscale
    container_name: ts-gitea
    hostname: [YOUR TAILSCALE HOST NAME]
    environment:
      - TS_AUTHKEY=[YOUR TAILSCALE AUTHENTICATION KEY]
      - TS_STATE_DIR=/var/lib/tailscale
      - TS_SERVE_CONFIG=/config/config.json
      - TS_HOSTNAME=[YOUR TAILSCALE HOST NAME]
    volumes:
      - /volume1/docker/[YOUR GITEA FOLDER]/ts/state:/var/lib/tailscale
      - /volume1/docker/[YOUR GITEA FOLDER]/ts/config:/config
      - /dev/net/tun:/dev/net/tun
    cap_add:
      - net_admin
      - sys_module
    restart: unless-stopped
  gitea:
    image: gitea/gitea:latest
    container_name: gitea
    environment:
      - GITEA__database__DB_TYPE=postgres
      - GITEA__database__HOST=db:5432
      - GITEA__database__NAME=gitea
      - GITEA__database__USER=gitea
      - GITEA__database__PASSWD=gitea
      - USER_UID=1000
      - USER_GID=1000
      - SMTP_PORT=587
      - DEFAULT_UI_LOCATION=America/Edmonton
      - GITEA__server__DOMAIN=gitea.[YOUR-TAIL-NET].ts.net
      - GITEA__server__ROOT_URL=https://gitea.[YOUR-TAIL-NET].ts.net
      - GITEA__server__LFS_JWT_SECRET=[GENERATE A RANDOM HEX VALUE -> openssl rand -hex 16]
      - GITEA__server__HTTP_ADDR=0.0.0.0
    restart: always
    volumes:
      - /volume1/docker/[YOUR GITEA FOLDER]/app:/data
    network_mode: service:ts-gitea
    depends_on:
      - db
      - ts-gitea
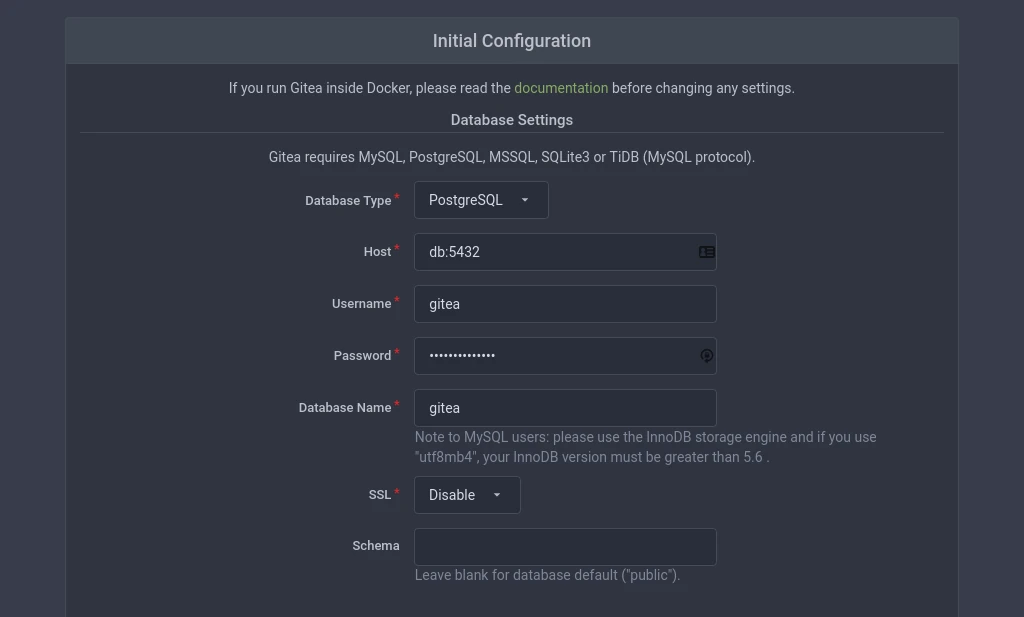
If successful, when you connect to Gitea you will be brought to an initial configuration page: